Orchids (Phalaenopsis) are often the first experience an aspiring orchid grower may have with orchid care.
This native of southeast Asia is one of the most beautiful, and also extraordinarily hardy, long-blooming and easy to grow.

Their easy-growing habits, along with the many gorgeous varieties available, have made the orchid phalaenopsis the top choice among commercial growers.
Phalaenopsis orchid care is easy. By following a few simple guidelines, you can experience satisfying success growing hardy, gorgeous, phalaenopsis orchids in your home as houseplants.
In this article, we will share basic phalaenopsis orchid care along with propagation, repotting tips, smart orchid care, and maintenance ideas to save you money. Read on to learn more.
- 4 Reasons Why Phalaenopsis Orchids Are Called The Beginner’s Orchids
- How To Select And Buy Phalaenopsis Orchids?
- How to Care For Your Phalaenopsis Orchids
- Care Of Orchids After Flowering
- How Often Do You Need to Repot Phalaenopsis Orchids?
- What Are The Best Phalaenopsis Orchid Pots?
- How to Repot Phalaenopsis Orchids Indoors Without Making a Mess
- Moth Orchid Species
- Grow With Confidence
Quick Phalaenopsis Orchid Care Guide
- Family: Orchidaceae
- Origin: Native to Philippines, tropic regions of Asia and Australia
- Pronounced: fayl-eh-NOP-sis
- Common Names: Moth Orchid
- Uses: Grown as individual specimens to use indoors to display for their sprays of colorful flowers and also as a florist cut flower
- Height: Plants grow to 12 inches tall with flower spikes reaching 24” – 36” above the foliage
- USDA Hardiness Zones: Zone 10 – grows in other “zones” with protection
- Flowers: usually 2 – 5 inches across with colors ranging from pure white, to yellow, pink, purple, rose, orange with polka dots, stripes and almost the rainbow
- Foliage: Olive green, leathery leaves
- Phalaenopsis Orchid Care Requirements: Moderately bright light (but not direct light), grows well in an east window, water when plant starts drying out usually every 7-10 days, feed with balanced orchid fertilizer, minimum nighttime temperature around 63°-65° degrees Fahrenheit and maximum day time temperatures of around 75° – 82° degrees Fahrenheit. Grows well under artificial light, correct watering plays a critical role.
- Miscellaneous: monopodial growing on a single stem
Here’s more on care for orchids.
4 Reasons Why Phalaenopsis Orchids Are Called The Beginner’s Orchids
The phalaenopsis has often been called the “Best Beginner Orchids.” For those who have always enjoyed their beauty but never tried growing phalaenopsis orchids, they are the one to start with.
Here’s a few reasons why:
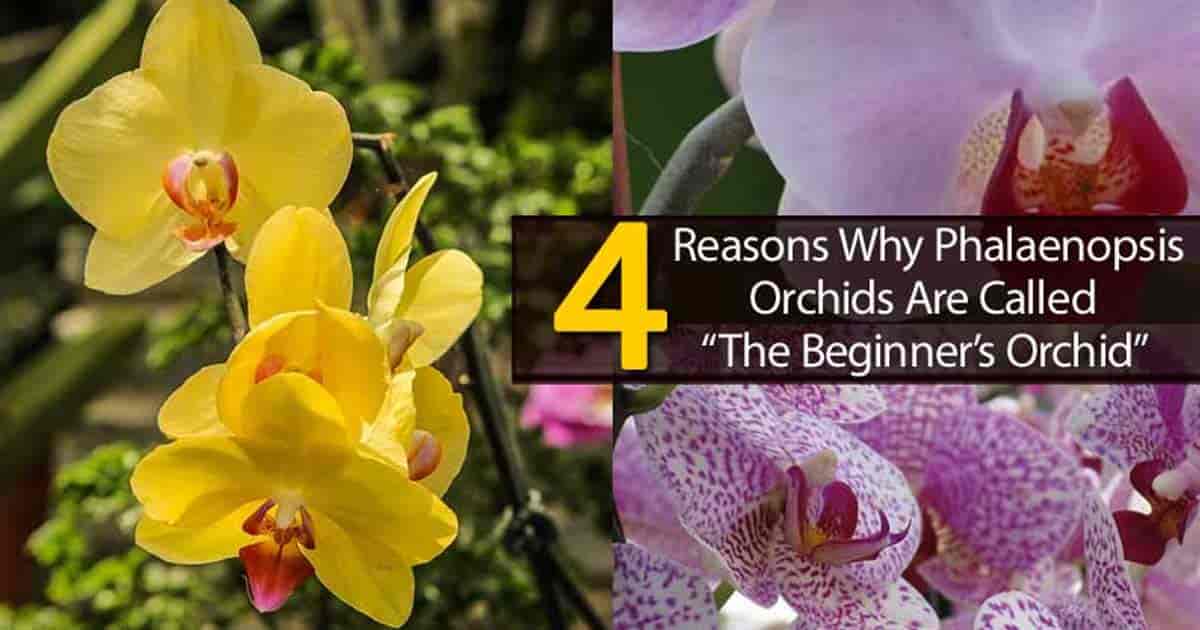
- Availability: Phalaenopsis orchids are no longer “exclusive” to florist shops and specialty grown. You’ll find them in grocery stores, big-box chains and even at farmers markets.
- Affordable: The phals popularity has brought down prices as more plants are produced and growing techniques improve.
- Easy Care: Phalaenopsis orchids are hardy and require less effort to care for and maintain.
- Exotic Beauty: Lots of color in little space, blooms last 2 – 4 months providing long-term year-round beauty.
How To Select And Buy Phalaenopsis Orchids?
Because of the new availability of phalaenopsis in the stores (and lower cost), many people will be making their first purchase this year. Here are a few things to look for when buying a plant:
Moth Phalaenopsis Orchids Plant
- Should be in proportion to the container.
- The foliage should be firm, clean, unblemished, medium green in color and free of any visible pest. Remember some of the leaves have a mottling that is natural.
- There should be roots in the growing media.
The Phalaenopsis Flowers
- The flower spike should be held well above the foliage on a strong, well-supported spike. Many growers use a bamboo stake to help in shipping.
- Free of any unnatural spotting
- The Phalaenopsis spike should still have several unopened flower buds. You will never be able to judge the flower life on your plant after all the flowers have opened.
- Make sure it fits your decor. Bathrooms with high humidity are a great place for this plant.
How to Care For Your Phalaenopsis Orchids
If you’ve been given an orchid plant or you’ve found one on sale in the veggie department at the grocery store, it is likely to be a phalaenopsis. The pretty, rugged plants come in a wide variety of colors, sizes, and styles. All are equally easy to care!
Here’s more on caring for orchids:

Phalaenopsis Orchid Care: Watering
The frequency of watering depends on a lot of variables. The type of potting medium used is one important factor. If your plant is potted in sphagnum moss, it will need less watering.
To determine whether your plant needs water, feel the surface of the potting medium and/or lift the pot. If it feels light, it is probably in need of water.
If your plant is potted in fir bark or tree fern fiber, a once-a-week schedule will probably work. The bark does not retain water well, but a good weekly drenching should give your plant all the water it needs.
Light and heat also affect the amount of watering necessary. Your “phal” will naturally need more frequent watering during hot, dry weather. In the wintertime, it will typically require less unless your heating system tends to dry out the air.
As with most plants, it is best to water it in the morning so it will have all of the daylight hours to soak up the water and dry any drops that may have fallen on the leaves.
It’s best to use room temperature water that has been allowed to sit for 24 hours to disperse any chemicals that may be present. Don’t use softened water as it contains too much sodium to be suitable for your plant.
Orchids like deep, occasional watering. Pour the water through the plant allowing it to run freely for a full minute or longer. Let the plant drain thoroughly before returning it to its usual setting.
Check the leaves and crown for errant water drops. Soak them up with a paper towel to help prevent crown rot and water spots on the leaves.
Some people believe that it’s a good idea to use ice cubes to water orchids because this will help prevent getting water on the leaves and in the crown; however, I like the idea but not the process.

Ice water is very bad for plant roots, and it is especially bad for the warmth-loving, tropical roots of an orchid.
Using ice cubes can damage the roots. Aside from that, a couple of ice cubes just don’t provide enough water. Remember your plant likes to be watered thoroughly, occasionally NOT lightly and frequently.
Providing Your Orchid The Right Amount of Light
Many orchids like terete Vandas thrive in direct sunlight as long as it doesn’t burn them. These orchids are a little different in that they are considered low-light orchids.
They do better in indirect light than in the direct sun. The ideal setting for a phal is an east window. If you only have a west window available, provide a sheer curtain to diffuse the bright light.
To determine whether your orchid is getting the right amount of light, keep an eye on the color of the leaves. Healthy orchid leaves are a bright yellow/green. Very dark green leaves indicate the plant needs more light.
If you are attempting to prompt your phal to re-bloom, provide it with more bright, indirect sunlight, or supplement with fluorescent light or a grow light. Like most blooming plants, good lighting is essential to blossom production.
Related: Bottom Leaves Turning Yellow?
Maintain a Comfortable Temperature
Phalaenopsis are the perfect choice as a flowering houseplant because they are comfortable at typical room temperature. As long as you keep your home warmer than 60 degrees Fahrenheit at night and between 70 and 80 degrees during the day, your orchid will be happy.
Avoid exposing your plant to temperatures lower than 60 degrees or higher than 95 degrees. Remember that the temperature near windows and doors may be different than that of the rest of your home, so position your phalaenopsis plants accordingly and keep a close eye on the temperature.
If your plant is near a door with hot or cold air blowing on it frequently throughout the day, it could suffer a bud drop due to temperature fluctuations. When this happens, buds fall without opening.
Balanced Fertilizer Helps Your Orchid Grow
When choosing a fertilizer for your phal, be sure to select a product specifically intended for orchids. Balanced orchid fertilizer is best. Look for a water-soluble fertilizer with NPK (nitrogen, phosphorus, and potassium) numbers along the lines of 20-20-20.
When mixing fertilizer, use about half the amount recommended by the manufacturer. Remember the orchid grower’s mantra “Fertilize weakly, weekly.” Follow this fertilizing scheduled three weeks out of the month. In the fourth week, water with plain water to flush out accumulated salts and other minerals.
Orchids Thrive On High Humidity
Phalaenopsis are epiphytic orchids, which means that they glean a great deal of moisture and nourishment from the air around them.
During hot, dry weather or during the winter months when the heat is on, your phal will need extra humidity. Providing it is easy.
Just set your orchid pot on a layer of pebbles in a drip tray. Pour in a little water, but be sure the water does not touch the bottom of the pot. Constant contact with water will cause root rot.
The water in the saucer will evaporate steadily creating a small humid zone around your plant. Be sure to check the water level in the drip tray frequently and replenish the water as needed.
Is Misting Orchids A Good Idea?
Misting is not a good idea for orchids. Moisture sprayed on the leaves is not the same as moisture circulating in the ambient air.
Additionally, water standing on the leaves causes water spots and can cause leaf spot diseases, so it’s best to avoid misting. To keep leaves clean, wipe them down with a damp cloth or paper towel from time to time. [source]
How Do I Make My Plant Leaves Shiny?
In addition to wiping the leaf clean with a damp paper towel, you may wish to try a commercial leaf cleaner or one of several homemade orchid leaf cleaners to enhance the appearance of the leaf. Take care not to let the solution touch the flowers.
DIY Leaf Cleaning Choices include:
- Cleaning orchid leaf with milk: A very diluted solution of milk and water provides foliar nourishment and promotes shine.
- Cleaning orchid leaves with alcohol deters pests: Wipe a very diluted solution of isopropyl alcohol and water over leaves to discourage pests.
- Neem oil discourages pests and adds shine: A few drops of neem oil in water can be wiped over leaves to repel and get rid of pesky aphids, thrips, and other common orchid pests while adding luster to leaves.
- White vinegar to remove lime spots: A solution of a couple of tablespoons of white vinegar in a cup of water can be wiped over leaves.
- Lemon juice to clean orchid leaf: A diluted solution of fresh lemon juice and water removes water spots and adds shine.
How to Clean Orchid Leaf With Water and Lemon Juice
In this video, Design Specialist Chris Karl shows you how to use lemon juice as a preservative for your orchid cut flowers gaining 2 weeks or more of enjoyment, and how to clean orchid leaf using lemon juice.
Lemon Juice Flower Preservative
- 2 teaspoons lemon juice
- 1 teaspoon chlorine free bleach
- 1 teaspoon common sugar
- 1 quart of lukewarm water
Materials For Cleaning Orchids Using Lemon Juice
- 1 sponge
- 1 lemon
Pest Control On Phalaenopsis Orchids
For controlling pests on phals, organic insecticides like neem oil (online at Amazon) is a natural solution that’s safe and an excellent solution to for the environmentally conscious houseplant owner.
Phalaenopsis should be monitored for:
- Aphids
- Orchid Mealybugs
- Tiny Red Spider mites
- Orchid plant scale
- Slugs that attack new shoots, leaf and root tips cause considerable damage
- Tips On How To Use Neem Oil For Orchid Pests
These can usually be removed with a soft cloth and soapy water. If you choose to use a commercial pest control product, be sure to follow all label instructions.
Related: Brassavola Nodosa (Lady of the Night)
Care Of Orchids After Flowering
When you purchase or receive your phalaenopsis orchid, it will ideally have a flower or two and quite a few buds waiting to open. Phals tend to bloom for a long time, so you can look forward to enjoying blooms for several months. When your plant has finished flowering, you may wonder what to do with the remaining stem or flower spike.
There are three schools of thought on the topic of cutting the flower spike:
- Some people leave the flower spike in place and allow it to eventually fall off naturally.
- Some cut it back to about four inches (leaving a couple of pairs of flower nodes) thinking this will encourage rebloom sooner.
- Still, others cut the spike all the way back to the central flower spike and simply wait until the coming year to enjoy an all-new spike with all-new blossoms.
Of the three methods, we prefer #3. There is no reason to leave the flower spike in place to fall off naturally. It’s ugly, and until it dies, it takes energy from the plant.
While cutting the existing spike back and encouraging it to bloom again will get quicker blooms but not better flowers. Second blossoms on an old spike are smaller and fewer in number.
When you cut the spike all the way back to the base, you will need to wait about a year for a new spike to grow and bloom, but when it does the flowers will be at least as big, beautiful and abundant as the first bloom. If you’ve taken good care of your orchid, they may even be bigger and better.
Patience is an essential part of orchid care during the blooming cycle. With proper care, your plant will treat you to blooms for several months of the year. After blooming, the plant will need to rest and regenerate. All-in-all, completion of the orchid blooming cycle can take between nine and fourteen months to complete. [source]
Good Air Circulation is Essential
Although it is not a good idea to keep your orchid in a drafty area due to bud drop problems and another condition known as scorch, which manifests as dry, brown leaf tips and shrunken stems, it is a good idea to maintain a little gentle air movement.
Gently moving air supports good carbon dioxide exchange, which helps your orchid grow. Having an overhead fan turning gently or a freestanding fan directed away from your plants also helps evaporate excess moisture which might cause fungal infection and other diseases of the flower spike and leaf. [source]

How Often Do You Need to Repot Phalaenopsis Orchids?
One thing you should be aware of in repotting a phalaenopsis orchid is that they are monopodial.
This means they have a single main stem which grows up from a single, central point. These orchids produce one or two new leaf annually at the apex of the main stem.
Signs that repotting is needed are a bit different with monopodial orchids than with sympodial orchids.
Signs Your Orchid Plant Needs Repotting
You can simply set a schedule to repot your orchid every couple of years as long as the plant has not become dangerously top-heavy and seems to be doing well. Just trim back the old leaf when they die back and trim back the flower spike when it has finished blooming.
Otherwise, watch for signs the plant needs a new pot. When the new leaves grow, older leaves below them die back. This means the stem becomes long and leggy beneath the new growth and exposed, aerial roots develop. This results in a shabby-looking, top-heavy plant.
When new leaves appear, and the old leaves die, it is time to repot your phal, but this is not the only time.
You should also repot if your orchid is potted in a bark potting mix and it has broken down. When bark decomposes, it does not provide good drainage and must be replaced.
Repotting phalaenopsis orchids in bloom is not recommended. You can repot at any time throughout the growing season, but take care not to repot while your plant is blooming.
This will cause the flowers to fall off. Wait until the plant has completed its blooming cycle, then trim the spike and dead leaf and repot the plant. More on Phalaenopsis pruning here.
Good Preparation Means Flawless Repotting
When ready to repot the plant, be sure to have all your materials close at hand to make the operation quick and easy. This reduces stress on you and the orchid!
Here’s what you’ll need to do a professional job:
- A bucket of water that has been allowed to stand for a day
- An appropriate orchid potting mix
- A sharp, sterile set of pruners
- A suitable pot or container
- A brand new razor blade
- A pair of scissors
- A label (optional)
You can purchase a potting medium specially prepared for orchids at your local garden center, or you can make your own. Here is a good phalaenopsis orchid mix recipe from the Missouri Botanical Gardens.
Here’s what you’ll need:
Note: The fir bark must be in one-quarter to one-half inch chunks. It must be intended for this purpose. Ordinary landscaping mulch will not work. The charcoal must also be specially prepared for horticultural use; barbecue charcoal will not work. Perlite is readily available as a horticultural material.
Other good choices in media materials include lava rock, coconut husk, gravel, and stones.
Growing Orchids In LECA
My first plant job was at a small orchid nursery, where they had a house full of Phalaenopsis. They were planted in what the “boss” called “solite.” It looked like a volcanic rock.
What we now call LECA – Lightweight Expanded Clay Aggregate. I started eventually playing around growing some of the phalaenopsis in sphagnum moss.
If there is one thing I’ve learned from my decades of growing plants… there is no exact way to grow something.
The American Orchid Association warns that use of inorganic materials (i.e., rocks and gravel) as substrate could be problematic because of rapid drying and difficulty providing enough nourishment. [source]
Here’s what to do:
Mix the ingredients at a rate of five parts fir bark to one part each of the other two components.
If your orchid is potted in sphagnum moss or tree fern fiber, you are probably best off to replant in bark. This is the preferred medium for full-size orchids because it protects the root from rot. Mini-orchids do better in moss, fiber or coco coir (more on that later).
With full-size specimens, even if you water very seldom, you are better off with light, airy bark than with highly water-retaining materials. Orchids are very drought tolerant, but they do not tolerate wet roots.
How To Repot An Phalaenopsis Orchid: Video
What Are The Best Phalaenopsis Orchid Pots?
You may be tempted to give your orchid a little more root room in hopes of delaying repotting, but this is actually a very bad idea. Monopodial orchids do best when the roots are closely contained. If they have room to grow, blooming will be negatively affected. Additionally, having a lot of empty soil around orchid root is a recipe for rotten roots.
When you select your container, it should be only slightly larger than the existing container. In fact, it could be the same size if you have quite a bit of dead root structure to prune away. The idea is to give your phal fresh potting mix and a little bit of wiggle room for the root.
Many orchid fanciers use specialized pots with slits in the sides to provide more ventilation for the roots, but this is not entirely essential. When you choose a pot made of a material that allows air circulation you needn’t worry quite so much about the structure of the pot.
Clay pots are porous and substantial, so they provide a couple of benefits. They keep the root well aerated, and they provide weight to help prevent slightly top-heavy plants from toppling.
Even so, many growers prefer plastic pots. The advantage of plastic is that it is inexpensive, and for growers who seldom water, its water retention properties are valuable.
This video provides some creative ideas for mounting and potting orchids, as well as creating hanging orchid displays.
Ideas for Growing Orchids in a Small Space
Keep it Clean!
No matter which type of pot you choose, be sure it is either brand-new or thoroughly sterilized.
You can sterilize used pots with a long soak in hot water with dish soap and bleach. The bleach-to-water ratio should be 9-to-1.
Soak the pots for a couple of hours; scrub them clean and rinse thoroughly.
Plastic pots can be dried and used immediately. Clay pots must air for a couple of days so that all the bleach fumes will dissipate. Bleach can damage plant roots.
How to Repot Phalaenopsis Orchids Indoors Without Making a Mess
Once you have gathered your tools, prepared your pot and have your mixed or purchased phalaenopsis potting mix ready, you are ready to begin.
Here’s what to do:
- Gently take your phal out of its old pot. This can be challenging because the roots tend to hang on. You may need to slide a slim knife blade between the sides of the pot and the root to disengage them. Be careful not to cut through healthy roots. If the plant just refuses to let go of the pot, you may need to destroy the pot!
- Remove every trace of the old potting medium. The goal is to repot bare roots. Take care to pick out the old bark and gently rinse the roots before repotting in fresh potting mix.
- Trim away or pull away dead tissue. There may be some old, dead leaf left on the stem. Be sure to remove them completely. Trim away any soft, whitered tissue as this means it is dead.Cut the old bloom spike all the way back to the body of the plant and gently trim dead roots using your razor blade. You can tell roots are dead if they are hollow or very wiry. If in doubt, soak the roots in water. Living roots will turn green rapidly. You may also notice that the stem extends beneath the roots. Carefully trim this extension back with your pruning shears.
- Once the plant is cleaned and trimmed, lay it aside gently for a moment and prepare the new pot by lining the bottom with a light layer of potting medium. Gently set the plant on top of this layer, making sure the top of the root ball is aligned with the top of the pot. Add or subtract potting mix as needed to get your plant properly situated.
- Coax the roots into place and surround them with potting medium. Remember the pot should be a close fit, so you may need to manipulate the roots to contain them in the pot gently. Add potting mix as you go to hold the roots in place. Be sure not to leave any air pockets. Once the pot is full, gently press the potting medium into place and add more as needed.
- Set your newly potted plant into your bucket of room-temperature water. Allow it to soak and rest for about an hour. Remove it from the water and let it drain.
- Add a label if you so desire. If you have several orchids (or you just want to present a professional image) it’s a good idea to add a horticultural label that includes the Latin name of the plant and the date you repotted it. You can attach the label to the pot or use a blank plastic stake and just poke it into the edge of the pot.
Having this information at your fingertips will help you remember when to repot. It is also helpful to have the Latin name of a plant handy in case you need to research pests, diseases, growth habits, etc. Some orchidists also include information such as bloom date on the label. Some keep a journal to take note of this information.
What About Repotting Orchid Keiki’s and Air Roots?
This is more a form of propagation than a function of repotting. If your phal sends out from he flower spike a “Keiki” from the Hawaiian word meaning “child” or “baby”, you can separate it from the parent plant, give it a pot of its own and enjoy a whole new plant. This video from the American Orchid Society shares how to identify a keiki that is ready for a new home.
Prepare your potting mix and pot and use the advice for repotting an existing plant as a guide when potting a keiki for the first time. This post from MrBrownThumb shows the process.
“Air root” potting is only one method of propagation. You can also grow these hardy plants through division, cuttings or even from seed (if you are very determined and have a lot of time on your hands).
The division process is simple and involves cutting a larger plant into two or more portions to get starts for new plants. Portions to be used as cuttings can come from roots, stems or even a flower spike as long as actively growing roots or growth nodes are present.
It’s a simple matter of providing the aspiring orchid sections with a good growing medium, the right conditions, and care to prosper. [source]
As we’ve said, it is possible to grow orchids from seed, but it is quite difficult as Brad from Brad’s Greenhouse shows us here:
How to Grow Orchids from Seeds – Orchid Flasks
According to the Missouri Botanical Garden, this process is good for producing massive numbers of plants commercially, but not generally recommended for casual hobbyists. It involves many complicated and exacting steps using specially formulated agar-based orchid gelling medium enriched with hormones and nutrients. Sterile conditions must be maintained. [source]
But isn’t growing orchid seeds naturally “a thing” now?
You may have heard of growing orchids from seed – kitchen style, and you may think this is something you’d like to try, but the fact is this Thai method of home-growing orchids from seed is every bit as complicated as the professional method described in the video above. Additionally, it has far less chance of success.
In the final analysis, when choosing a propagation method for orchids, you are far better off with any of the many simple division or cutting methods available.
The fact is, orchids are made to reproduce. Like weeds, a new plant can grow from almost any portion of the parent plant as long as the proper growing conditions are provided.

Moth Orchid Species
According to the American Orchid Society the moth orchid was first cultivated in Europe from plants gathered in Manila in the early 1800s. By the mid-1800s new varieties were developed and introduced.
During this time, there was some confusion regarding the classification and naming of some of the new cultivars; however, the pretty plants remained popular and since that time over 200 varieties have been located, documented and developed.
Some of the most popular phalaenopsis lower classifications are:
- Phalaenopsis amabilis is a lovely orchid. In fact, the term “amabilis” means “lovely.” First, discovered in 1653 off a small island on the coast of New Guinea, this is one of the largest and most impressive orchid species. This type of orchid is traditionally given as a gift to express either congratulations or condolences.
- Phalaenopsis aphrodite is a compact species found from the Phillippines to southwest Taiwan featuring attractive rounded foliage and pretty white flowers. The leaves are thicker, and rounder than those of the phal orchids. The blooms are exceptionally large, yet the plant is on the small side.
- Phalaenopsis schilleriana is a fabulously easy-keeper. Found on Luzon and other surrounding Philippine islands, this pretty plant has attractive, barred leaves and produces copious numbers of flowers in shades of lilac or pink. It is one of the earliest known species having been named in 1860. [source]
- Kaleidoscope orchid (aka Baldan’s kaleidoscope) is a large variety which produces a blossom spike that can stand up to three feet high. The bold, striated flowers may be as large as four inches across. Flowers sport maroon stripes on a yellow background with a bright red center. [source]
- Phalaenopsis bellina is a small orchid originating from Borneo and Malaysia. This very fragrant orchid produces small, waxy blooms in shades of creamy yellow and magenta. The plant produces one or more short flower spikes which emerge from between the leaves. These spikes should not be cut as they re-bloom readily as long as they remain green. This compact plant makes a nice desktop companion.
- Miniature phalaenopsis orchids include: Phalaenopsis parishii and Phalaenopsis lobbii both from eastern Himalaya to Indochina. Phal lobbii – named in honor of Cornish plant hunter Thomas Lobb. There is also a hybrid of the two known as Phal Lovely Kid. These are all true miniatures and will not grow larger than a few inches high. Because they are so small, it is best to pot them in a finer medium such as coco coir or sphagnum moss. They do well planted in groupings or kept as a terrarium plant.
- Doritaenopsis is an intergeneric hybrid cross between the phalaenopsis and doritis orchids. The doritis orchid is a semi-terrestrial orchid, and the phalaenopsis is an epiphyte. Crossing the two produces a hardy plant that exhibits the best features of each parent.
To view a handy, photographic chart of all Phalaenopsis Species:
What Is The Difference Between Phalaenopsis and Doritaenopsis Orchids?
The plants are essentially the same thing. A Doritaenopsis is a cross between a Doritis and a Phal. The culture is the same.
The taxonomy has been simplified somewhat by combining everything under Phalaenopsis. Plants named Doritaenopsis retain the name, as changing the genus name to phalaenopsis would result in some duplicate names. [source]
Grow With Confidence
In the early days of orchid discovery and development, growers believed that these truly rugged and enthusiastic plants were difficult to grow.
The fact is, this was just a matter of perception. Centuries of trial-and-error, controlled experimentation, and abundant experience have finally shown that orchids are actually among the easiest plants to grow, as long as you follow the simple guidelines we’ve laid out here.
Of all the many varieties of lovely orchids available today, the Phalaenopsis orchid is easily the most popular, most robust and most readily available. With its easy-going habits and long-lasting blooms, even an inexperienced plant keeper can enjoy success.