
Spider plants (Chlorophytum comosum) are about as easygoing as houseplants get. The spider plant is one of the most common houseplants, easily grown and especially popular for how quickly it makes new plants.
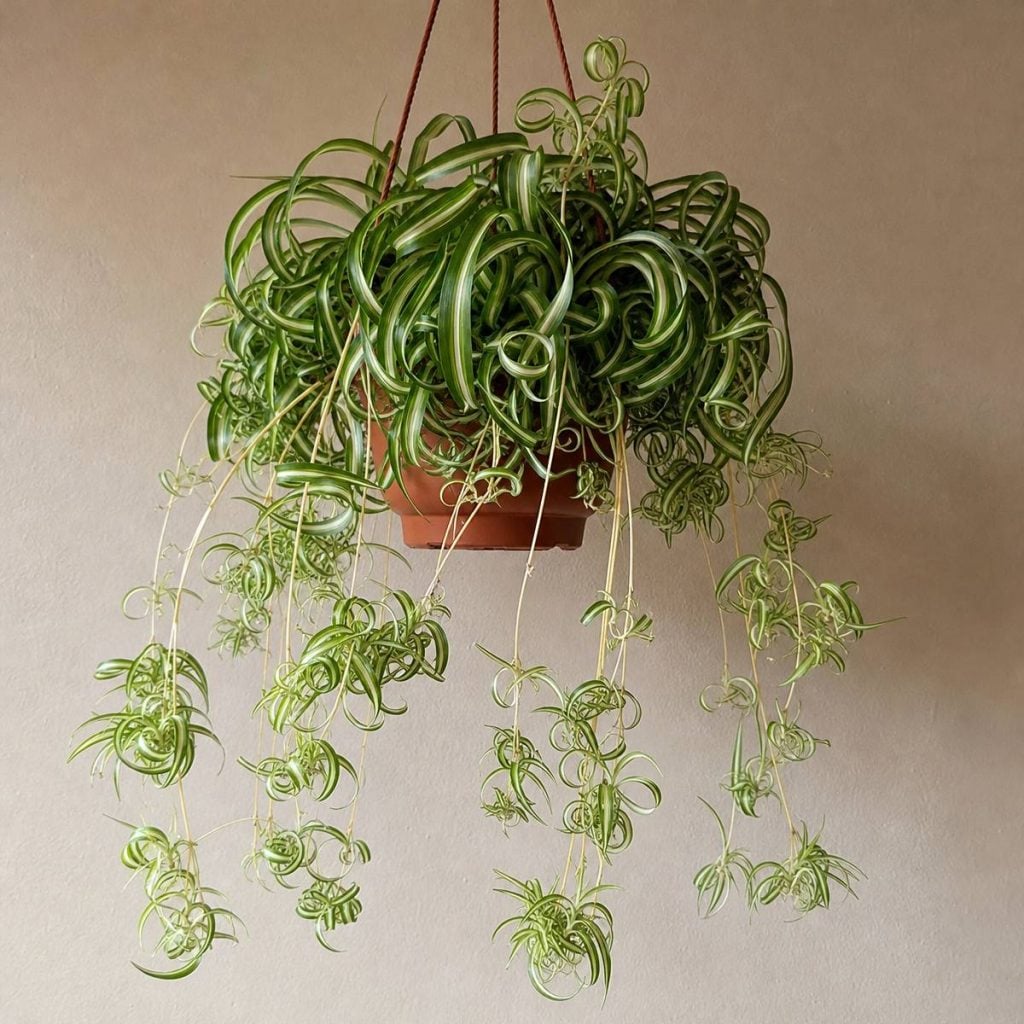
That speed is also why it can get a little wild. Long, wiry stems shoot out with small white flowers and baby plants on the ends, leaves pile up, and a few brown tips show up along the way. A little pruning brings it back into shape.
Good news for pet owners while we’re at it: spider plant is non-toxic to dogs and cats.
Pruning is one small part of spider plant care, but it’s the part that keeps the plant looking its best. So how do you prune a spider plant, how much should you cut, and when? Let’s walk through it.
Does a Spider Plant Need Pruning?
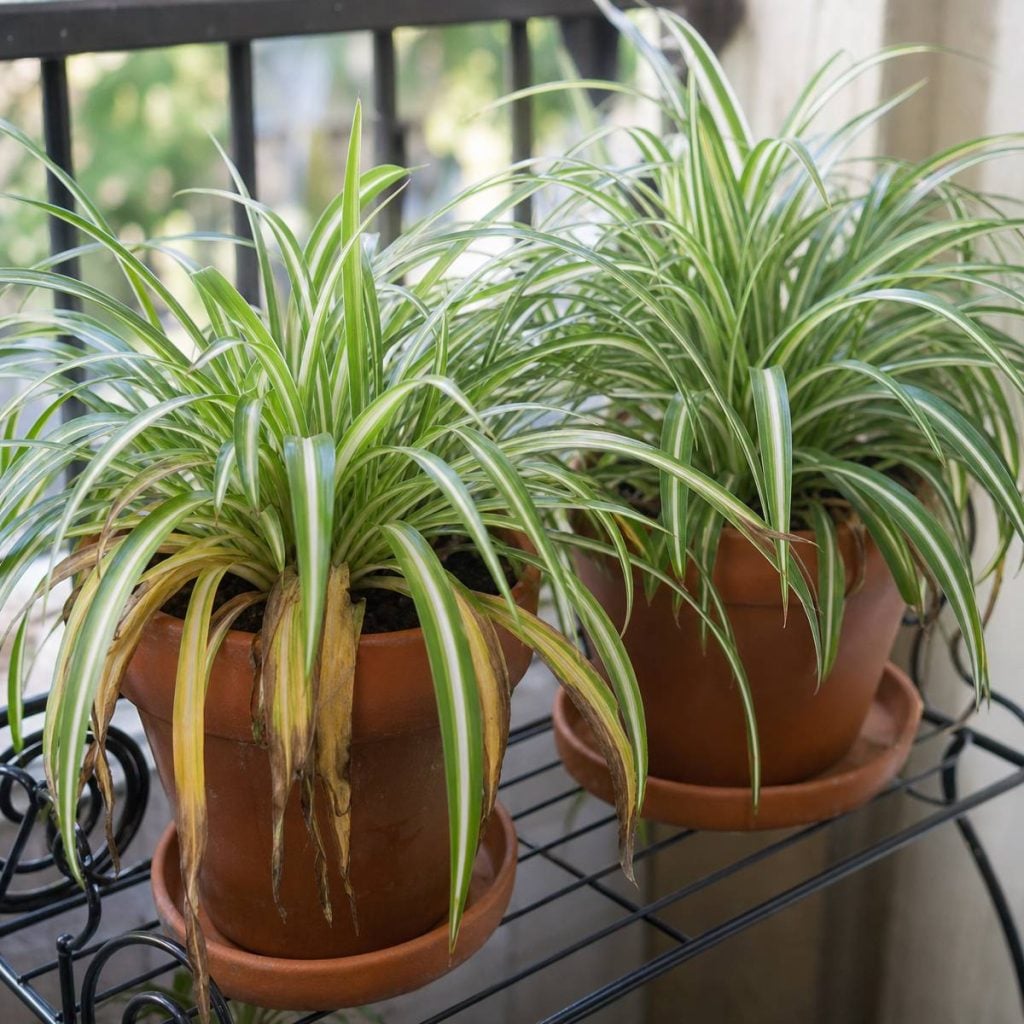
Not much, but it does need grooming. The Missouri Botanical Garden says to cut off yellowed foliage and brown tips, and it notes that brown tips will occur unless conditions are perfect. In other words, a few brown tips don’t mean you’ve failed. They come with the plant.
Pruning a spider plant usually means three jobs:
- Grooming: removing yellow, dead or brown-tipped leaves.
- Runner control: cutting off some or all of the long stems that carry baby plants (plantlets, also called spiderettes or spiderlings).
- Dividing: splitting an overgrown clump when the roots fill the pot.
None of these is required on a schedule. The plantlets can be detached to make new plants or left on to create a very full basket. That part is up to you.
When To Prune a Spider Plant
Trim off yellow, dead or brown-tipped leaves whenever you notice them. There’s no need to wait for a season to tidy a leaf.
Expect the most new runners after the days get shorter. Spider plants produce most of their offshoots when the days shorten in the fall. NC State Extension explains that the stems and plantlets develop when the mother plant gets short days and long, uninterrupted nights (less than 12 hours of light a day) for at least three weeks.
Bigger jobs are flexible too. You can repot a spider plant at any time of year and start new plants from plantlets at any time of year.
Tools: Sharp, Clean Scissors or Pruners
Spider plant leaves and runners are soft and thin, so a sharp pair of scissors or hand pruners does the job. Dull blades crush and tear instead of cutting cleanly.
I’ve used Felco #2 hand pruners for more than 50 years, and the habit that matters most is the same with any tool: keep it sharp and keep it clean.
Iowa State University Extension says to remove dirt, sap and other debris from pruning tools before disinfecting them. Then wipe or dip the blades in alcohol. It says rubbing alcohol (70% isopropyl alcohol) can be used straight from the container with no dilution and no prolonged soak, and it is less corrosive to tools than bleach.
Why bother on a houseplant? University of Missouri IPM points out that disease organisms may not be visible on tools, but they can be spread from plant to plant during pruning. Clean your blades before you start, and again before you move on to the next plant. For more detail, see how to sanitize pruners.
How To Prune a Spider Plant, Step by Step
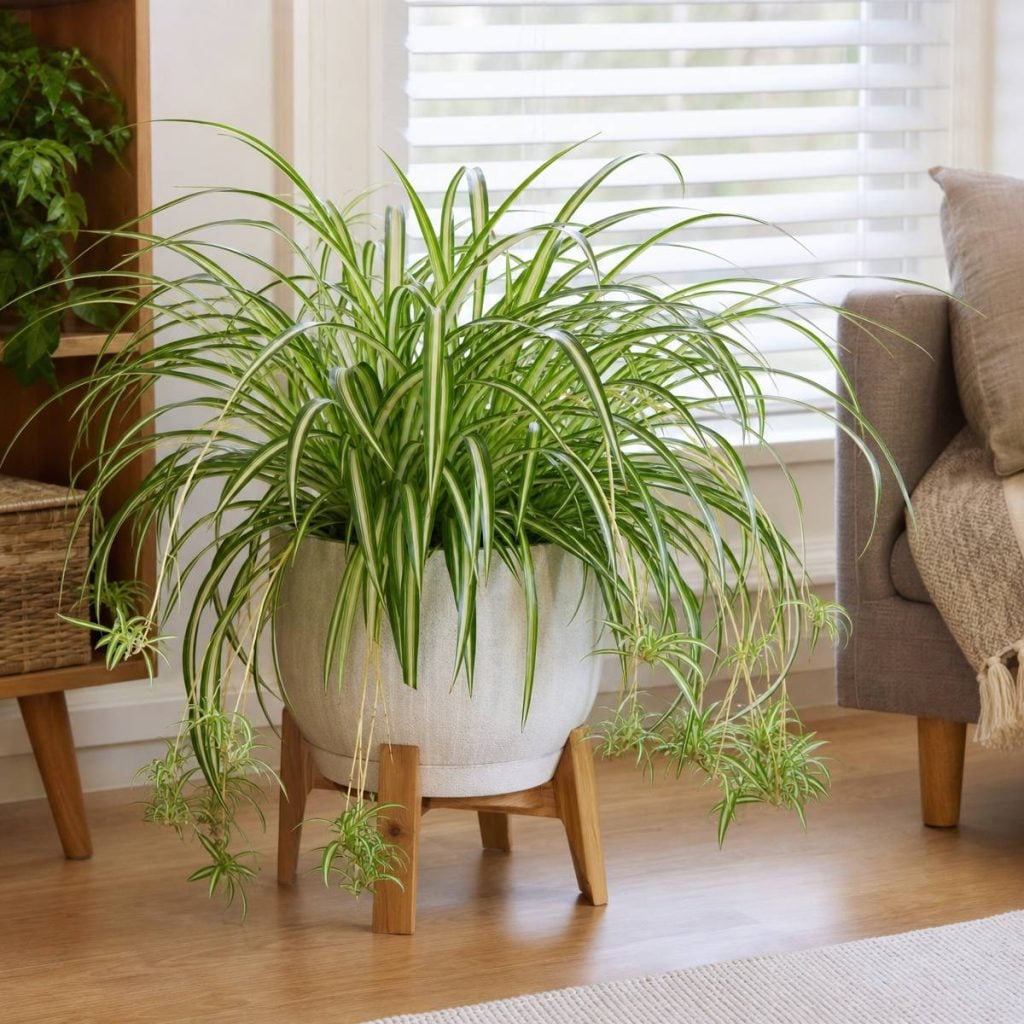
1. Start at the base and work outward. Turn the pot and look at the whole plant before you cut. Work around it so you don’t leave one side bare.
2. Remove yellow and dead leaves. Cut off yellowed foliage. Follow a fully yellow or dead leaf down and cut it off near the base of the plant.
3. Snip off brown tips. Cut off brown tips too. You don’t have to remove the whole leaf for a brown tip. Trim off just the brown part, angling the cut to follow the leaf’s natural point so it still looks like a leaf.
4. Thin the runners. Cut unwanted runners (the long stems carrying plantlets) back where they meet the mother plant. These long stems produce both the flowers and the plantlets, so cutting a runner also removes its flowers.
5. Stop while it still looks full. Grooming and runner thinning are enough for most plants. If the whole pot is crowded, divide it instead of cutting away healthy leaves.
Fix the Cause of Brown Tips
Trimming hides brown tips, but new ones will keep coming if the cause is still there. The extension sources point to a few culprits:
- Fertilizer and salts: Leaf tip burn is caused by too much fertilizer or water that is high in soluble salts.
- Dry air and dry soil: Low humidity and excessively dry soil may also cause brown tips, and so can too little water.
- Tap water: Avoid watering with tap water because the chlorine and fluorides can cause leaf tip burn. UF/IFAS Extension says spider plant is particularly sensitive to fluoridated water and that rainwater or distilled water is best if your water is treated with fluoride.
- Harsh sun: The foliage will scald in direct sun, and the plant is often called intolerant of direct sunlight. Views vary, though: spider plants can tolerate some direct sunlight, but midday light may scorch the leaves.
I’ve photographed spider plants growing in full sun at neighbors’ homes, both as an in-ground groundcover and in pots. That’s my own observation, not a rule; the extension advice above is the safer bet. And in Florida, an assessment predicted spider plant to become invasive, and it is no longer recommended there, so keep yours in a pot and out of the ground.
Go easy on feeding, too. Don’t over-fertilize, as this decreases plantlet formation, and the plant’s tubers store reserve food, so it won’t run short of nutrients.
Roots: Dividing an Overgrown Spider Plant
Spider plants form thick, fleshy tuberous roots. Divide and repot them before the roots expand enough to crack the container, especially in plastic pots. Division is also one of the easy ways to propagate it.
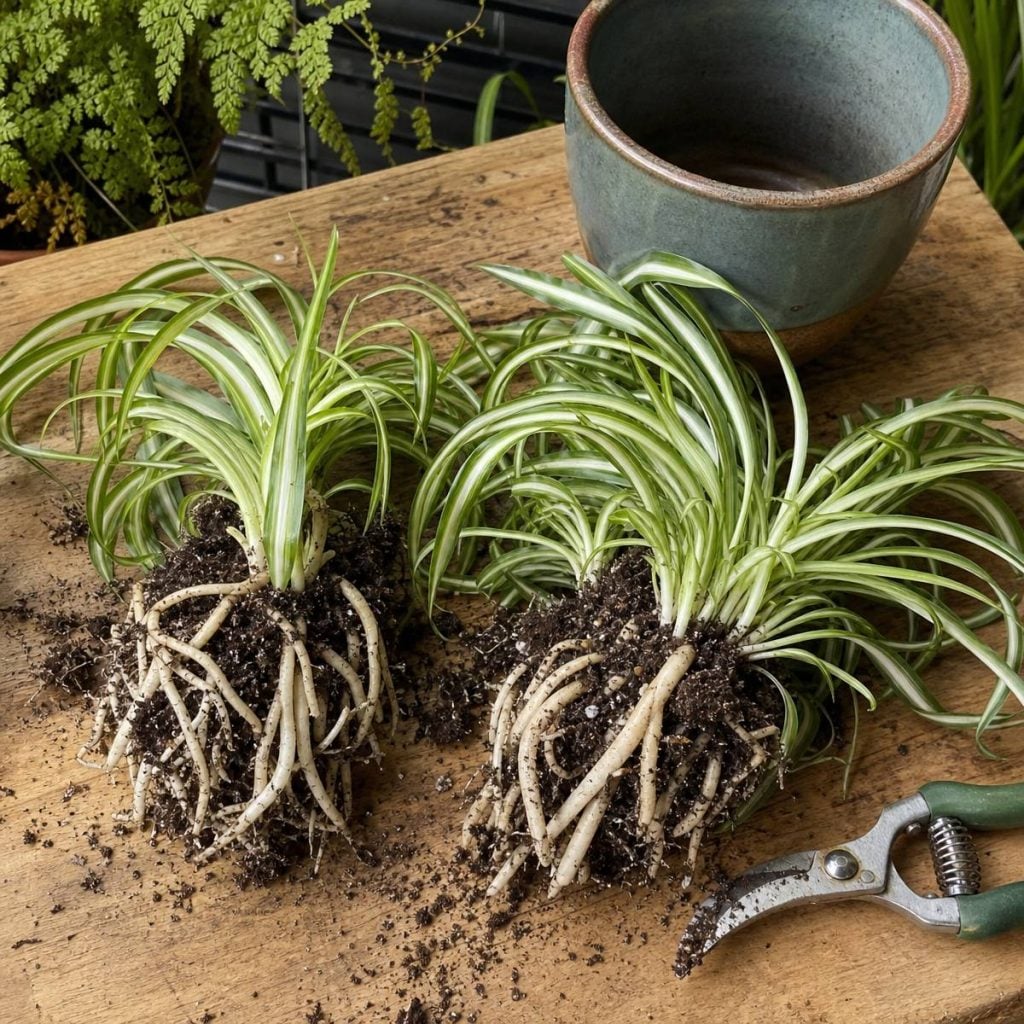
To divide, slide the plant out of its pot and pull or cut the clump into sections, each with its own leaves and roots. Pot each section in a container with drainage holes and a general-purpose potting soil, which suits spider plants. Our spider plant soil guide has more on mixes.
While the roots are out, look them over. Root rot usually results from a soil mix that does not drain quickly or from excessive watering, and the plant is susceptible to root rot if waterlogged. Cut away any soft, mushy, dark roots with your clean tools before repotting.
After repotting, hold off on fertilizer. Clemson Extension says to wait four to six months before feeding newly potted plants. A potted spider plant thrives with repotting once a year while young and every other year once it matures.
Turning Trimmed Plantlets Into New Plants
Every runner you cut off is a free plant. The plantlets root readily when they come into contact with soil. Detach them once roots have formed and pot them directly into moist growing mix. Our guide to spider plant propagation covers more ways to root them.
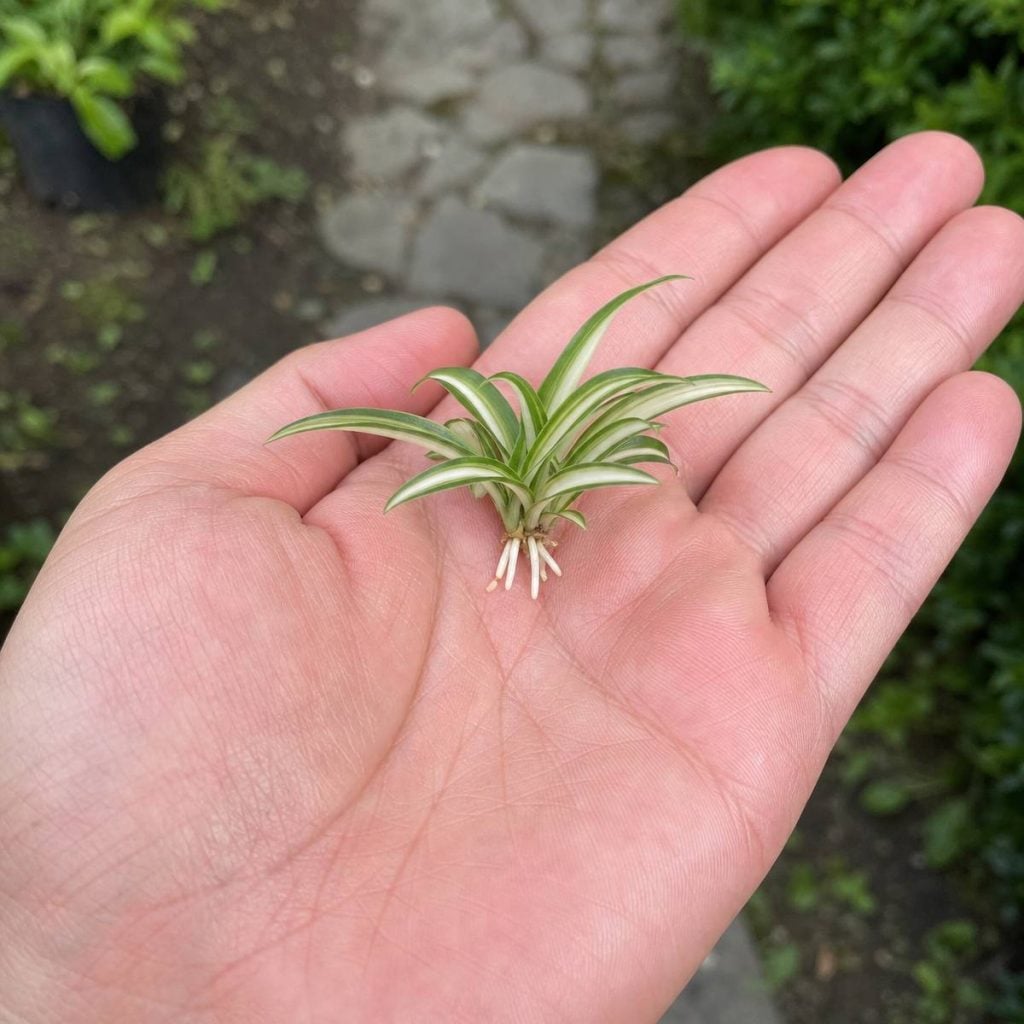
Give the new pots bright, indirect light, which spider plants grow best in, and keep the mix moist while the roots settle in. Then keep the new plant, or share it with a friend.
One note for Florida gardeners: an assessment of non-native plants recently predicted spider plant to become invasive in Florida, and it is no longer recommended there. If you’re in Florida, keep your extra babies in pots rather than planting them out in the landscape.
How do you handle all those spider babies: pot them up, give them away, or let them dangle? Tell us in the comments!
Frequently Asked Questions
Are you supposed to trim spider plants?
Yes, but lightly. Cut off yellowed foliage and brown tips, which will occur unless conditions are perfect. You can also cut off runners with baby plants, though the plantlets can be left on to create a very full basket. Clean your scissors with rubbing alcohol first.
Should I cut the brown tips off my spider plant?
You can. Cut off brown tips, and you only need to trim the brown part, not the whole leaf. Trimming will not stop new brown tips, though. Tip burn is caused by too much fertilizer or water high in soluble salts, and low humidity and very dry soil may also cause brown tips.
How do I clean my scissors before pruning a spider plant?
Wipe off any dirt or sap, then wipe or dip the blades in rubbing alcohol. Rubbing alcohol (70% isopropyl) can be used straight from the container, with no dilution and no long soak, and it is less corrosive than bleach. Disease organisms you can’t see on tools can spread from plant to plant during pruning.
Should I cut off spider plant babies?
It’s your choice. The plantlets can be detached to produce new plants or left on to create a very full basket. If you want new plants, detach the plantlets once roots have formed and pot them directly into moist growing mix. Spider plants propagate easily by plantlets or division.
Why does my spider plant keep getting brown tips?
Usually water, salts or dry conditions. Chlorine and fluorides in tap water can cause leaf tip burn, and spider plant is particularly sensitive to fluoridated water, so rainwater or distilled water is best if your water is fluoridated. Too much fertilizer, salty water, low humidity and excessively dry soil add to it. Foliage will also scald in direct sun.