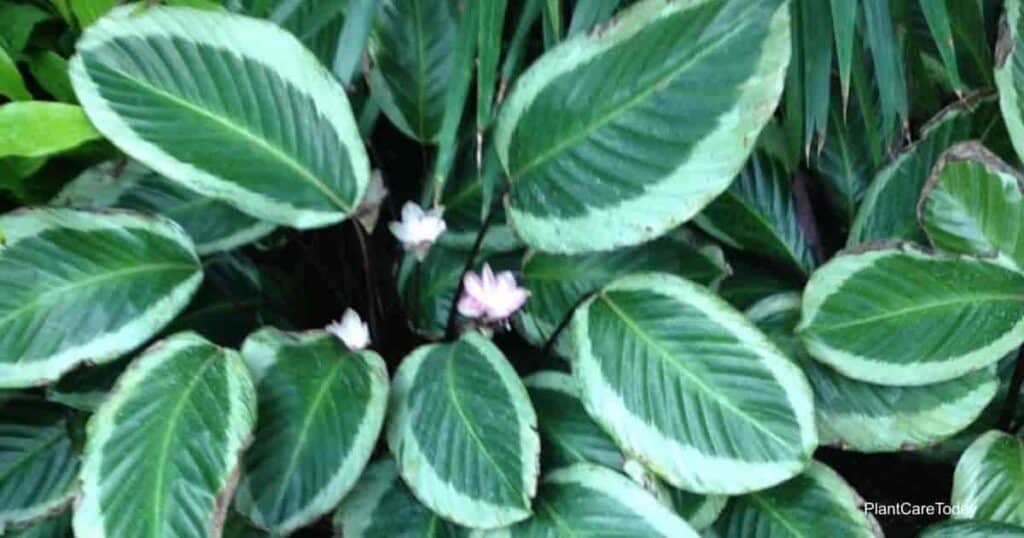
Most Calathea varieties also known as “prayer plants” found at the local garden center are attractive houseplants grown for their beautiful foliage. The Rattlesnake plant is a good example of its very colorful and patterned leaves.
The most common form of propagation for Calathea is a division of the mother plant at the time of repotting in the springtime.
A well-cared-for plant will spread and produce young plants or clumps along its sides. It’s easy to separate these into their own pots or new location and treat them as you would mature plants.
You can, most of the time, separate the young Calathea plants by untangling the roots with your fingers.
Other times, you may need to use a very sharp, sterile blade to separate the roots. Either way, be very gentle because the roots are quite delicate.
Although the young Calathea plants should be hardy from the start, give them some protection.
Keep them out of harsh elements, such as hot or cold drafts and bright, direct sunlight. A consistent temperature of 60° – 70° degrees Fahrenheit with indirect light is best.
You may wish to cover the young plants with plastic tenting to increase the ambient humidity and protect them from extremes.
Within 2 to 4 weeks, the young plants begin to show signs of new growth. Give them a little boost by feeding a nitrogen-rich, water-soluble fertilizer.
Tips For Success When Propagating Calathea
- The day before you repot and divide your Calathea plant, give it thorough watering to help reduce transplant stress.
- Make sure to choose pots with plenty of drainage holes in the bottom.
- Prepare your pots in advance.
- Place a coffee filter in the bottom of the pot to prevent loss of soil.
- Fill each pot halfway with a mixture of two parts peat moss or coco coir and one part perlite.
- Remove old soil from your plants’ roots gently before repotting your parent plant and divisions into the new fresh soil.
- Examine the roots and trim away any diseased or damaged sections.
- Place the parent plant and the divisions into prepared pots and backfill with more potting mix.
- Water the freshly potted plants thoroughly, allowing excess water to drain through.
- Keep the plants warm and protected until they have established themselves in their new pots.
How Do You Know When It’s Time to Propagate Calathea Plants?
If you have a healthy Calathea plant, it will grow enthusiastically and fill the pot with divisions every spring.
A larger plant will need repotting and dividing its offspring into its own pots annually.
There may be some instances in which you would divide an unhealthy plant. For example, suppose disease (root rot) or damage strikes any part of the plant. In that case, you may be able to save the healthy part by:
- Unpotting it
- Separating the healthy component from the unhealthy
- Repotting the healthy part
Facts About Calathea Division
- Most of the time, a Calathea plant can be divided evenly into two plants. If the plant is large and has produced several offspring, you may get several new plants.
- Water can make or break Calathea. Both the parent plant and the divisions are sensitive to excessive watering and chemicals in the water. Water judiciously using distilled, filtered, or rainwater.
Learn more on the critical topic of Calathea Watering, a must-read for success with your plants. - Failure to thrive may mean that your division did not have enough roots to become established. When you divide the offspring from the parent plants, make sure that the divisions have several leaves and a significant number of healthy roots.
How To Propagate Calathea From Seed?
Although it is possible to grow Calathea from seed, it can be harder to find the seeds than to source a parent plant for division.
Begin by purchasing your Calathea seeds from a reputable supplier. An established nursery that sells seeds online is probably one of your best choices.
Once you have your Calathea seed, follow these steps:
- Start the seeds in propagation trays or small pots using a half-and-half mixture of coarse sand and peat moss or a commercial seed starter mix.
- Moisten the starter mix thoroughly before placing it in the trays or pots.
- Sprinkle the seed very lightly over the soil’s surface, and then sprinkle a thin layer of starter mix over the seed. These seeds do best when planted a third of an inch or less deep.
- Cover the trays or pots lightly using clear plastic tray covers or clear plastic to help hold in humidity and maintain consistent warmth.
- If you cannot maintain a consistently warm ambient temperature, use a heated seedling mat underneath the trays or pots. The target temperature is 70° degrees Fahrenheit.
- Place the trays or pots in an area where they will receive bright, indirect sunlight.
- Take care to keep the soil moist.
- When your seedlings have reached a height of about 1-1/2″ inches, you can transplant them into their own pots. Handle the delicate roots with care during this process.