
Want to grow potatoes but don’t have acres of farmland? The secret most plant experts won’t tell you is that growing UP instead of OUT could triple your potato harvest while using a fraction of the space.
Potato towers are the game-changing solution that’s transforming how space-conscious gardeners grow their spuds.
And trust me, once you try this method, you’ll never go back to traditional potato rows again!
Why Your Garden NEEDS a Potato Tower (The Eye-Opening Benefits)
Potato towers aren’t just cool-looking garden projects. They’re productivity powerhouses.
Think of them as high-rise apartments for your potatoes, where each floor produces a new crop of residents!
- Space-saving miracle: Grow the equivalent of a 15-foot row in just 3 square feet
- Harvest jackpot: Yields can be up to 3x higher than traditional methods
- Pest protection: Elevating potatoes reduces damage from ground-dwelling pests
- Super simple harvest: No more treasure-hunting with a fork. Just dismantle and collect
- Better drainage: Goodbye, rotting tubers!
I was shocked to discover that a single well-maintained potato tower can produce up to 25 pounds of potatoes, enough to keep a small family in mashed potatoes for months!
Gather Your Tower Arsenal: Materials Shopping List
Building your potato skyscraper doesn’t require a degree in engineering. You probably have half these materials lying around already!
- Wire mesh or chicken wire (3-4 feet tall)
- Straw or hay (for insulation and moisture retention)
- Quality soil or compost
- Seed potatoes (certified disease-free)
- Few stakes or wooden posts for support
- Optional: Landscape fabric (prevents soil spillage)
- Optional: Tarp for extreme weather protection
Pro tip: Your local garden center might have wire towers specifically designed for potatoes, but they’re often overpriced. DIY is the way to go!
Location, Location, Location: Where to Build Your Potato Tower
Just like real estate, success with potato towers largely depends on location. Your potatoes aren’t divas, but they do have some non-negotiable needs:
- Sunshine superstar: 6-8 hours of direct sunlight daily (potatoes are solar-powered machines!)
- Drainage champion: Choose spots where water doesn’t pool after rain
- Wind protection: Nothing sadder than a toppled tower of almost-ready potatoes
- Easy access: You’ll need to water and check on your tower regularly
Forget what you’ve heard about potatoes growing anywhere; while they’re adaptable, giving them prime real estate in your garden will reward you with a spectacular harvest.
Building Your Potato Tower: 7 Steps to Spud Success
Ready to build? This tower construction is easier than assembling furniture from that Swedish store, and way more productive!
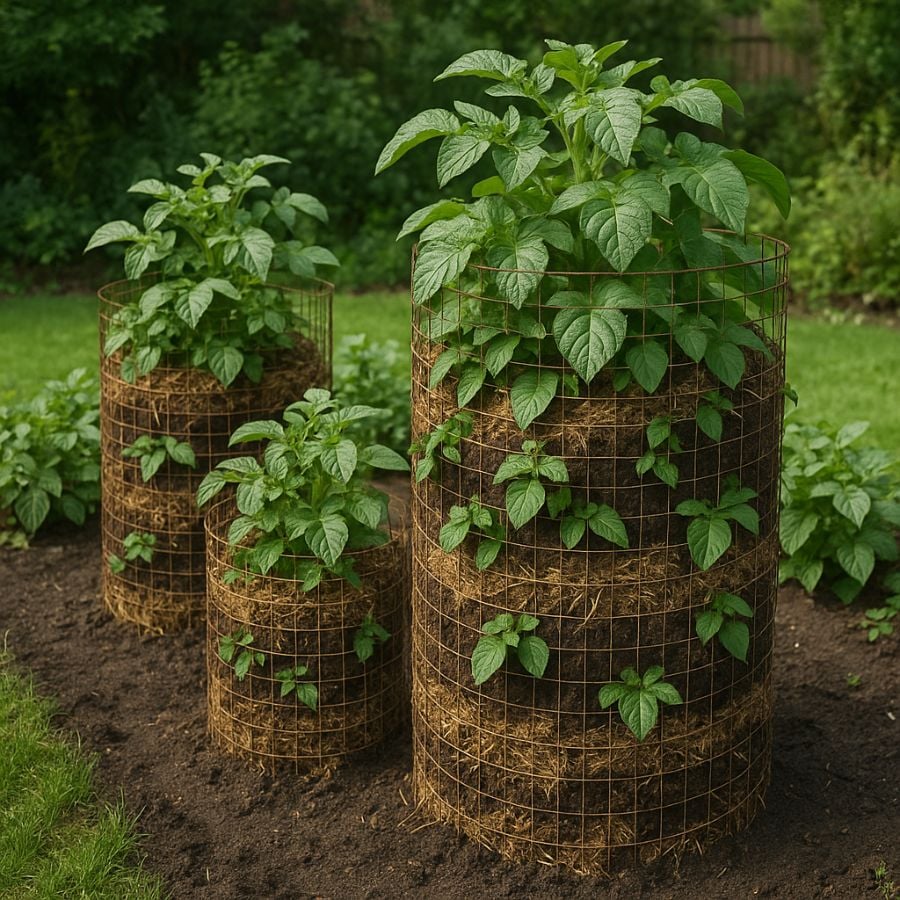
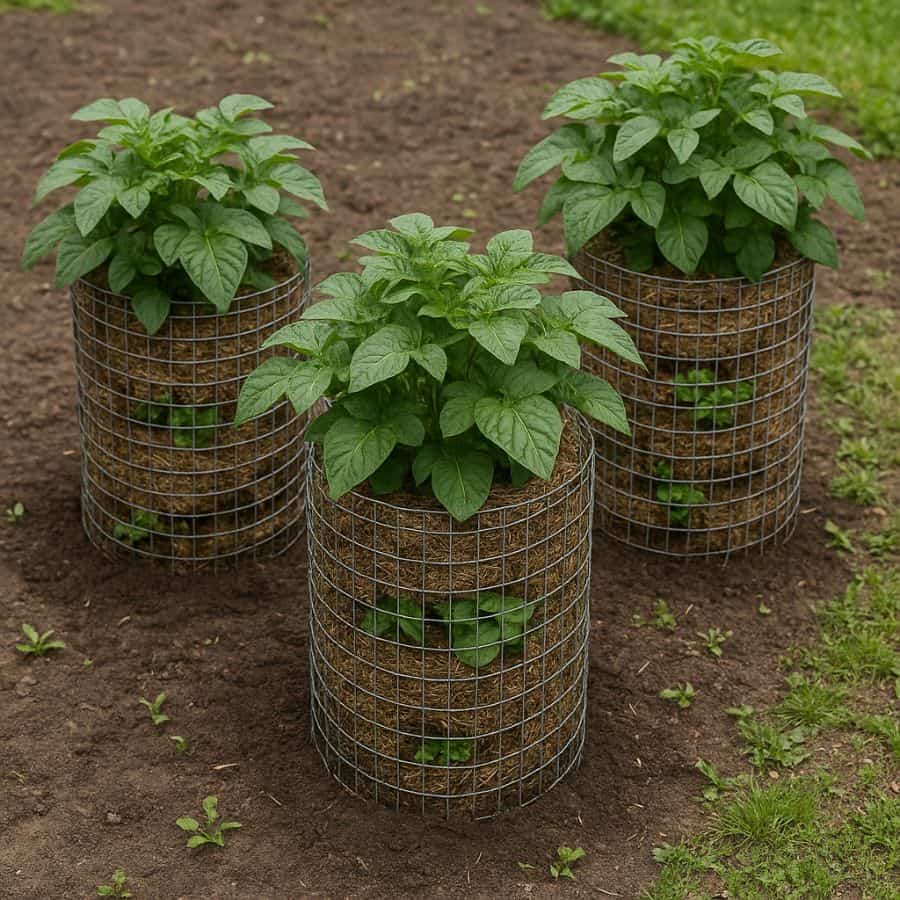
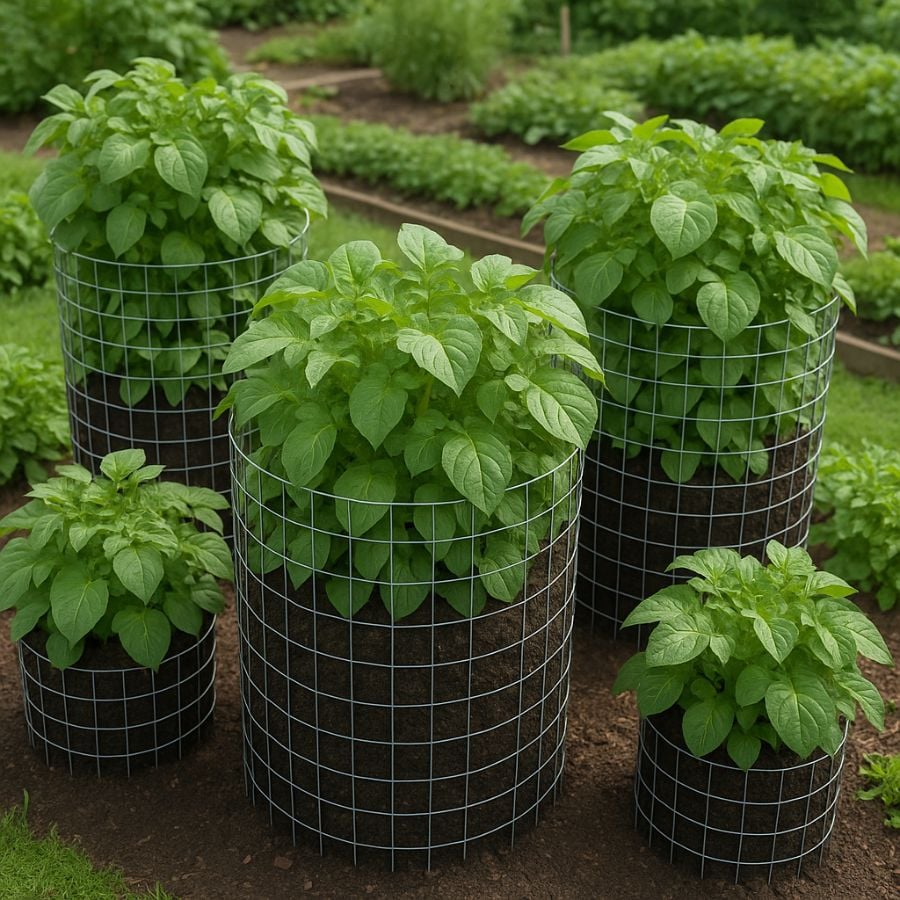
- Create your cylinder: Form a 3-4 foot tall cylinder with wire mesh (2-3 feet diameter) and secure the ends together
- Anchor it down: Place in your chosen spot and secure with stakes (think of it as giving your tower roots)
- Add insulation: Line the inside with straw or hay (this keeps moisture and temperature just right)
- Start with soil: Add about 6 inches of soil to the bottom layer
- First potato placement: Position seed potatoes evenly on this layer, about 6 inches apart
- Layer up: Cover with 4-6 inches of soil, then repeat the potato-soil layers until near the top
- Leave room: Keep some space at the top for watering (think of it as the tower’s swimming pool)
The primary difference between amateur and professional plant parents is their attention to detail. Take your time with each layer. You’re building a potato-producing machine!
Potato Prep: Getting Your Spuds Ready for Tower Life
Your potatoes require some preparation before they’re tower-ready. This isn’t like tossing seeds into soil. It’s more like tucking them into their new vertical home!
- Always use certified seed potatoes (grocery store potatoes are treated with sprout inhibitors and may carry diseases)
- Cut larger potatoes into pieces, ensuring each has at least one “eye” (those little dimples where sprouts emerge)
- Let the cut pieces dry for 1-2 days to form a protective callus (prevents rotting)
- Plant with eyes facing upward (like they’re looking for the sun)
Your potato tower is only as good as the spuds you put into it. Starting with quality seed potatoes is like having a solid foundation for a house; essential for everything that follows.
Tower TLC: Keeping Your Potato Tower Thriving
Your tower isn’t a “set it and forget it” project. These vertical spud condos need regular attention to flourish:
- Water wisdom: Keep soil consistently moist but never soggy (think wrung-out sponge, not mud puddle)
- Feed for success: Apply balanced organic fertilizer every 2-3 weeks
- Soil additions: As plants grow 6-8 inches tall, add more soil to cover stems (leaving just the top leaves peeking out)
- Pest patrol: Check regularly for potato beetles and remove them by hand
- Disease defense: Remove any yellowing or spotted leaves immediately
The game-changer for your potato tower isn’t what you think. It’s not fancy equipment or expensive fertilizers. It’s consistent care and the “hilling” process of adding soil as plants grow that transforms your yield from good to spectacular.
Harvest Time: Reaping Your Tower Rewards
When the plants flower and their foliage starts to yellow (typically 70-120 days after planting), it’s showtime! Harvesting from a tower is like unwrapping the world’s most delicious layered gift:
- Start at the top and carefully dismantle layer by layer
- Sift through the soil gently to find your treasures (potatoes bruise easily).
- Brush off soil (don’t wash until ready to use)
- Allow harvested potatoes to cure in cool, dark conditions for 1-2 weeks (this helps them store longer)
Most people make this mistake with their potato harvest: they dig too roughly, damaging the skins. Treat your homegrown potatoes like the precious gems they are!
Troubleshooting: When Your Tower Turns Tragic
Even the best-planned towers can face challenges. Here’s how to rescue your spuds from common problems:
- Waterlogged soil: Add more drainage holes to your tower and reduce watering
- Yellow, spindly plants: Your tower needs more sunlight. Consider relocating next season
- Potato beetles: Hand-pick or spray with organic neem oil solution
- Late blight: Remove affected plants immediately to prevent spread
Your potato plants are trying to tell you something important when they struggle. Listen to their leafy language, and you’ll be rewarded with healthier plants and bigger harvests.
From Tower to Table: Your Vertical Victory
Building a potato tower isn’t just gardening. It’s a revolutionary approach to food production that turns tiny spaces into food-generating powerhouses.
With minimal investment and moderate effort, you’ve created a system that maximizes your garden’s productivity vertically.
Next season, try growing different potato varieties in separate towers, from buttery Yukon Golds to dramatic purple potatoes. Each tower becomes its own experiment in flavor and abundance.
Remember: growing upward isn’t just smart gardening. It’s the future of sustainable food production in a world where space is at a premium.
Your potato tower isn’t just feeding your family; it’s part of a global movement toward more efficient food systems.